
"This backup software simply protects my files and works for me!" — Maria T.
Reliable daily backup protection for your files.
Getting Started with Local Backup
Welcome to Local Backup! This comprehensive guide will walk you through the complete setup process in three straightforward steps, from installation to creating your first automated backup. You'll be protecting your valuable data in under 10 minutes.
Follow these three steps to install Local Backup, create your first backup, and activate the full version for complete data protection.
Three Simple Steps
Download, Install & Launch Local Backup
Begin by downloading and installing Local Backup on your Windows computer. The installation process is quick and straightforward, guided by our setup wizard.
Installation Steps:
- Visit the download page to obtain the installation file
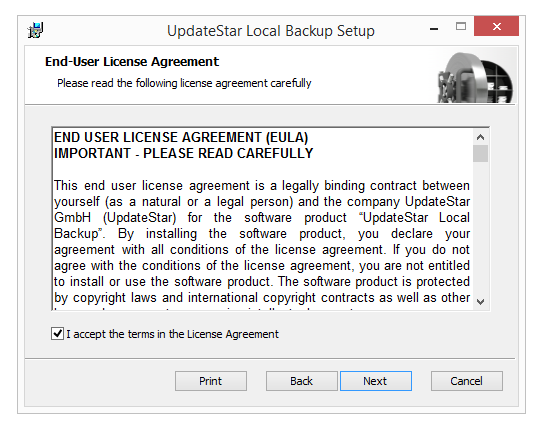
- Double-click the downloaded file to launch the setup wizard
- Follow the on-screen instructions to complete installation
- Accept the license agreement and choose installation location
- Launch Local Backup by double-clicking the desktop icon
Configure Your First Backup Task
Set up your initial backup configuration to protect your important files. Local Backup provides an intuitive interface for creating and managing backup tasks.
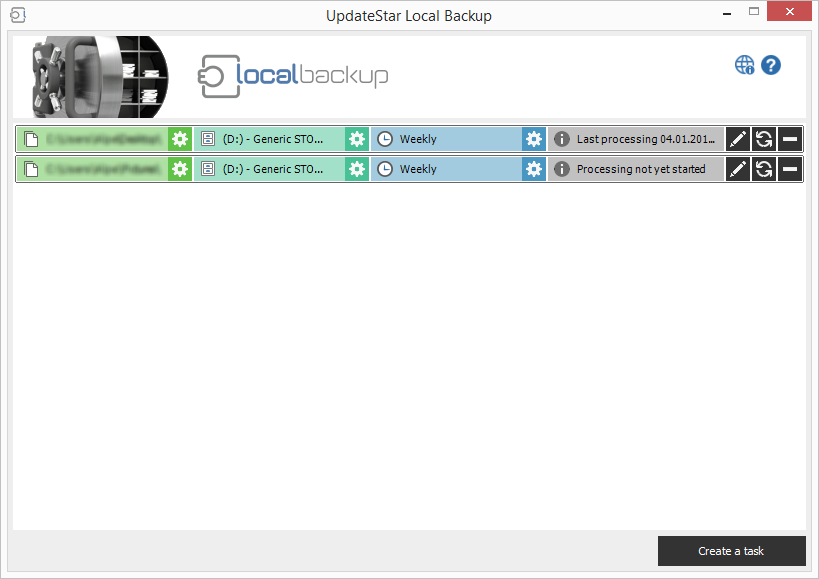
Creating Your Backup:
- Select Source Folders: Choose which files and folders to backup
- Choose Destination: Select external drive, network location, or NAS device
- Set Backup Type: Full backup, differential, or file synchronization
- Configure Schedule: Connection-triggered, scheduled, or manual backup
- Name Your Task: Give your backup configuration a descriptive name
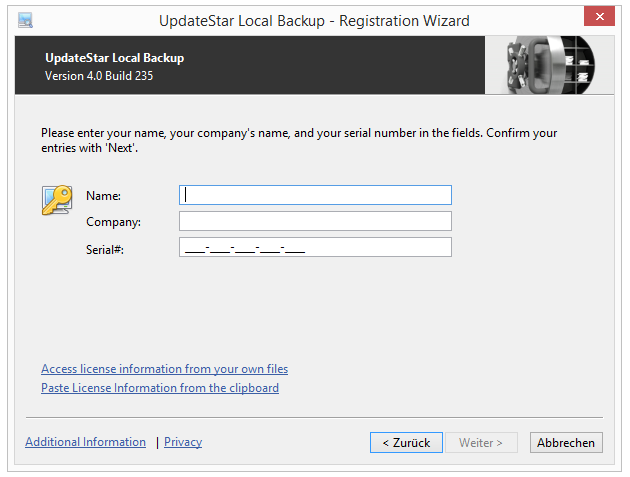
Activate Your Full License
The trial version displays incomplete backup results. Purchase a license to unlock complete functionality and remove all limitations.
Available Licenses:
Activation Process:
- Purchase your preferred license from our secure store
- Receive license key via email within minutes
- Open Local Backup and access the registration dialog
- Enter your license key and click "Activate"
- Full version is activated immediately—no reinstallation needed
Next Steps & Advanced Features
Configure Schedules
Set up connection-triggered backups, scheduled tasks, or configure instant synchronization for your most important files.
Enable Version Control
Activate version control to maintain multiple versions of your files, enabling you to restore previous versions when needed.
Review Logs
Use the Event Viewer to monitor backup operations, review completion status, and troubleshoot any issues that may arise.
Add More Tasks
Create additional backup tasks for different file sets, destinations, or schedules to maintain comprehensive data protection.
Quick Setup Checklist
- Download Local Backup
- Install on your computer
- Launch application
- Create backup task
- Configure schedule
- Run first backup
- Purchase license
- Activate full version
Time Required
- Download: 1-2 minutes
- Installation: 2-3 minutes
- Configuration: 3-5 minutes
- First Backup: Varies by data size
- Total Setup: Under 10 minutes
Trial vs Full Version
| Feature | Trial | Full |
|---|---|---|
| All Backup Types | ||
| Version Control | ||
| Scheduling | ||
| Complete Results | ||
| Full Functionality |
System Requirements
- Windows 11, 10, 8.1, 8, 7, Vista
- Intel Pentium 4 or equivalent
- 512 MB RAM minimum
- 50 MB disk space
- External drive for backups